Ember Router
We are going to review:
 Main Router
 Add new routes
 Application route
By default, App folder contains a router.js file, which you have to suscribe every route of your application. If you don't suscribe the new routes, Ember cannot render it. This could be the first file which you can start to explore an Ember Application.
This file contains all your router configuration:
import EmberRouter from '@ember/routing/router';
import config from './config/environment';

const Router = EmberRouter.extend({
  location: config.locationType,
  rootURL: config.rootURL
});

Router.map(function() {
  /*
   *
   *   Here you can put your routes
   *
  */
});

export default Router;
Although you can modify this file by your own, if you will use the cli, maybe it doesn't necessary touch this file, only for special things. In our case we are going to use the ember cli.
Creating routes
By default ember have a router.js empty. Additional you could generate a route with the cli. Every route generated must be suscribed in router.js, and it could have a template with the same name, for this reason when you create a route from cli, you will generate three files: a js file, hbs file and test (the test only containts a qUnit test which test if the route exists).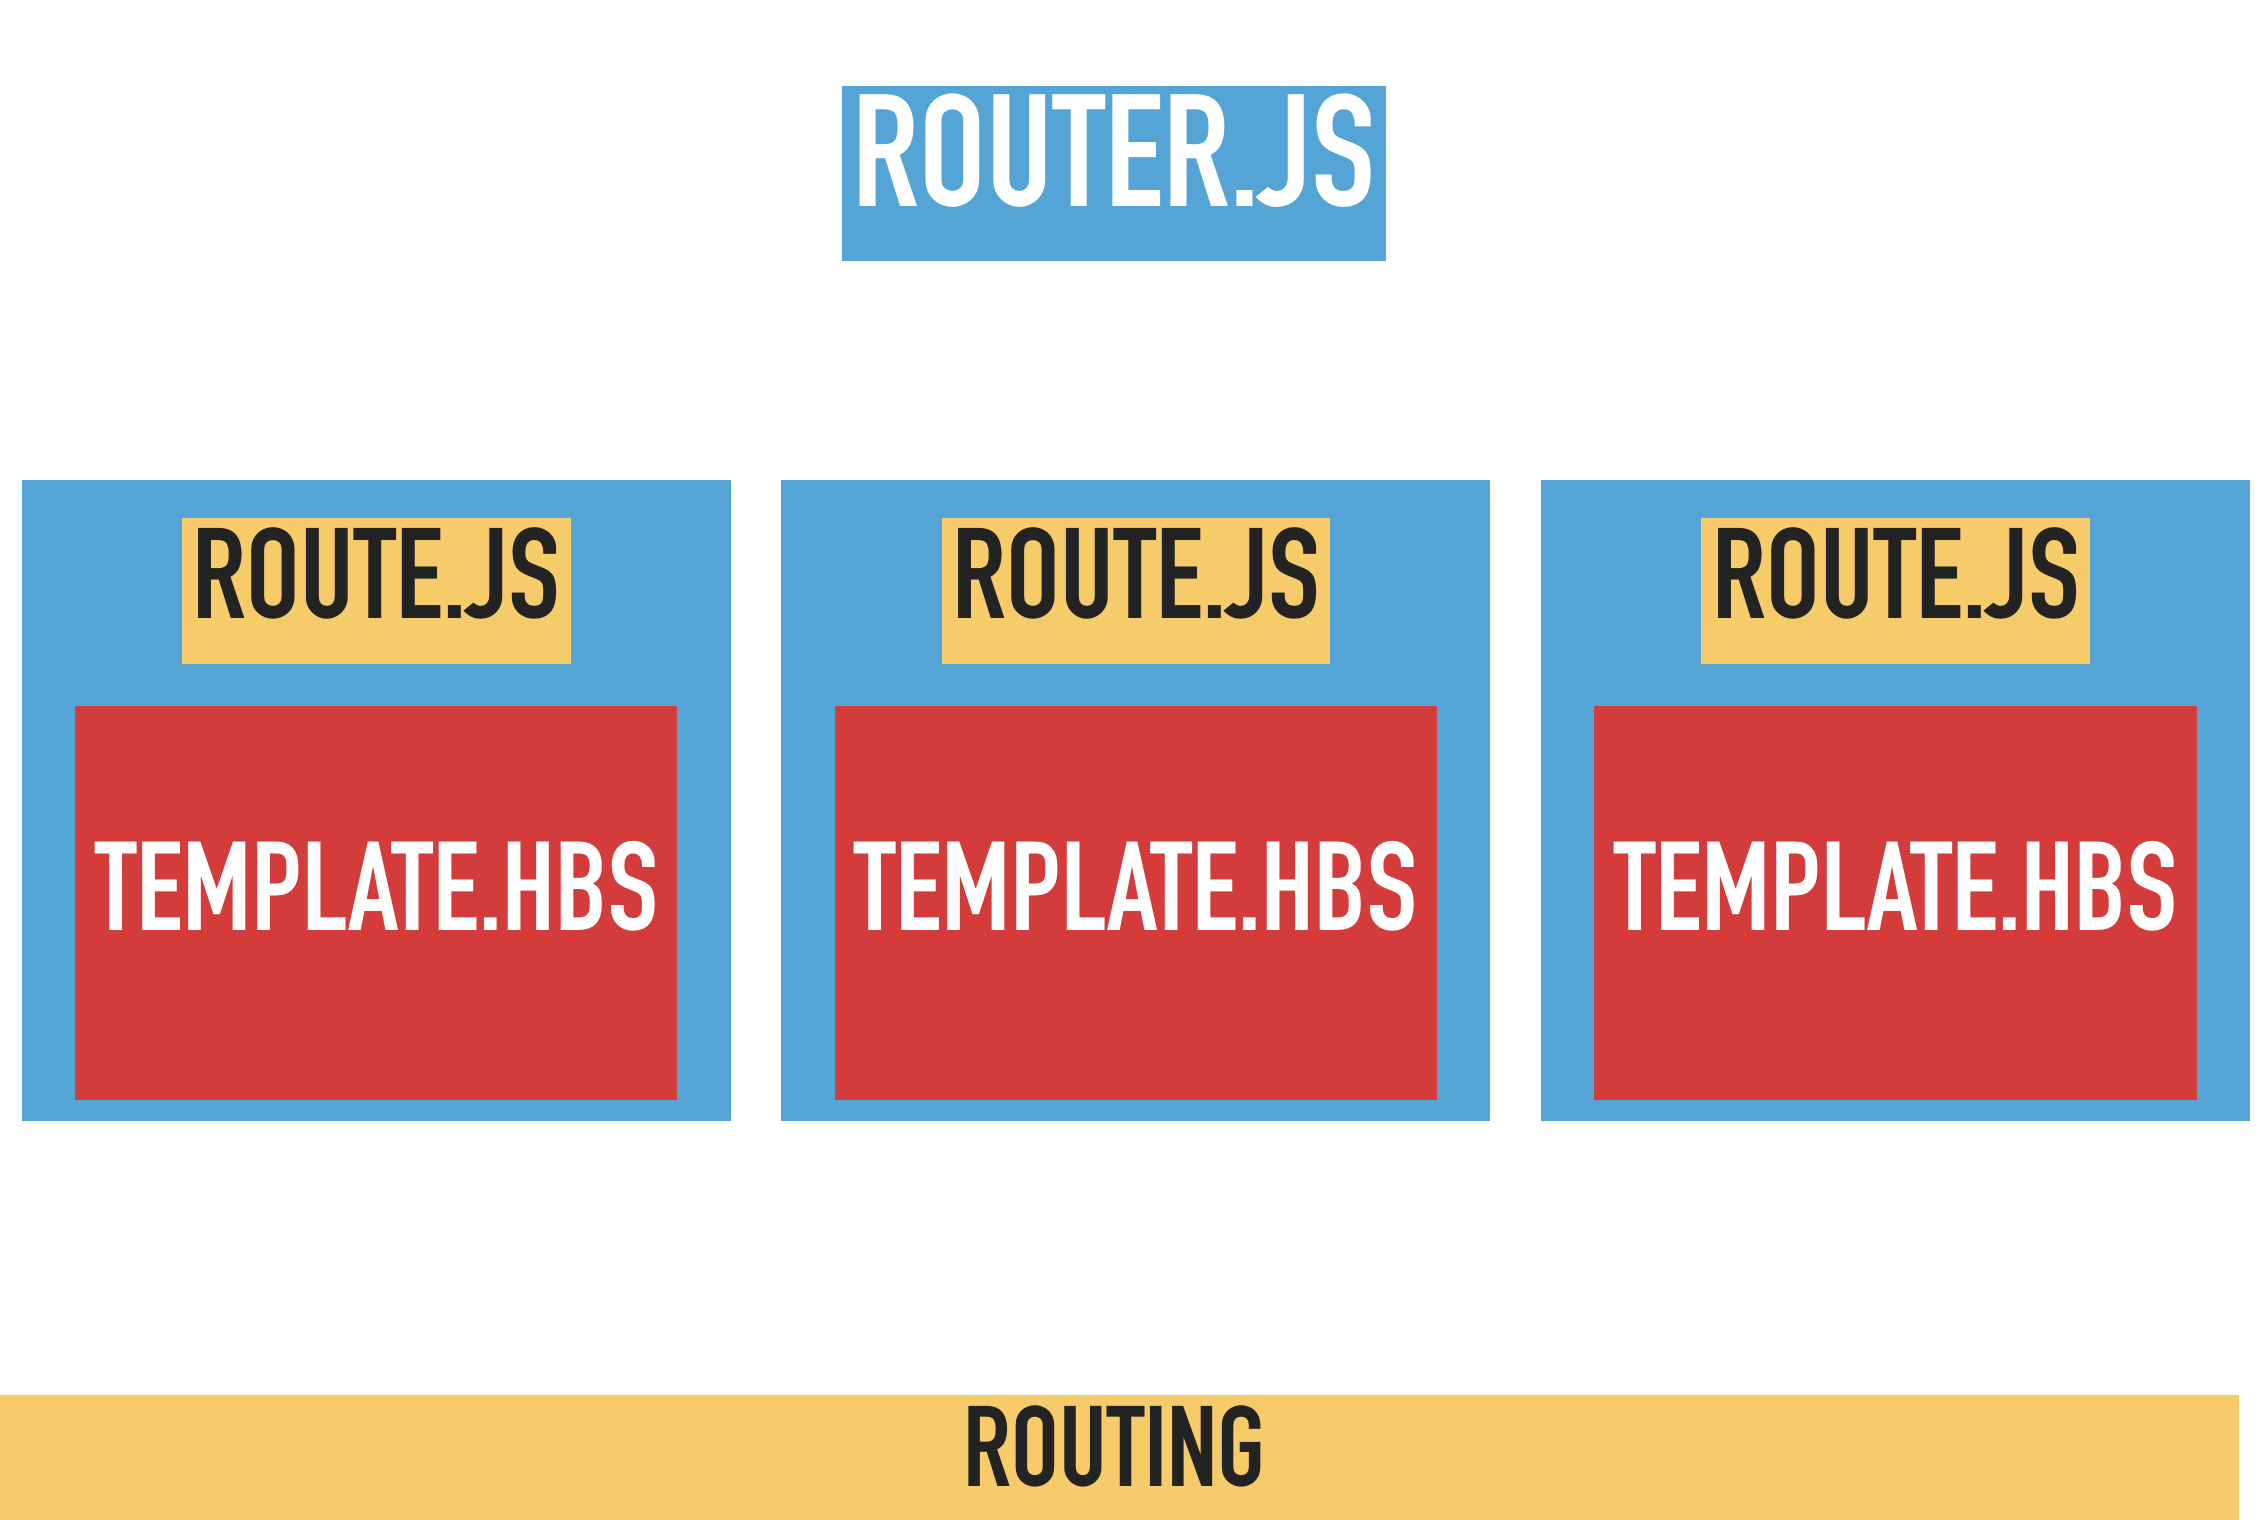
By default, your empty application doesn't have any route.js file, but it have a template called application.hbs.
In Ember the file names are very important!
By default you have the following hierarchy in routes:
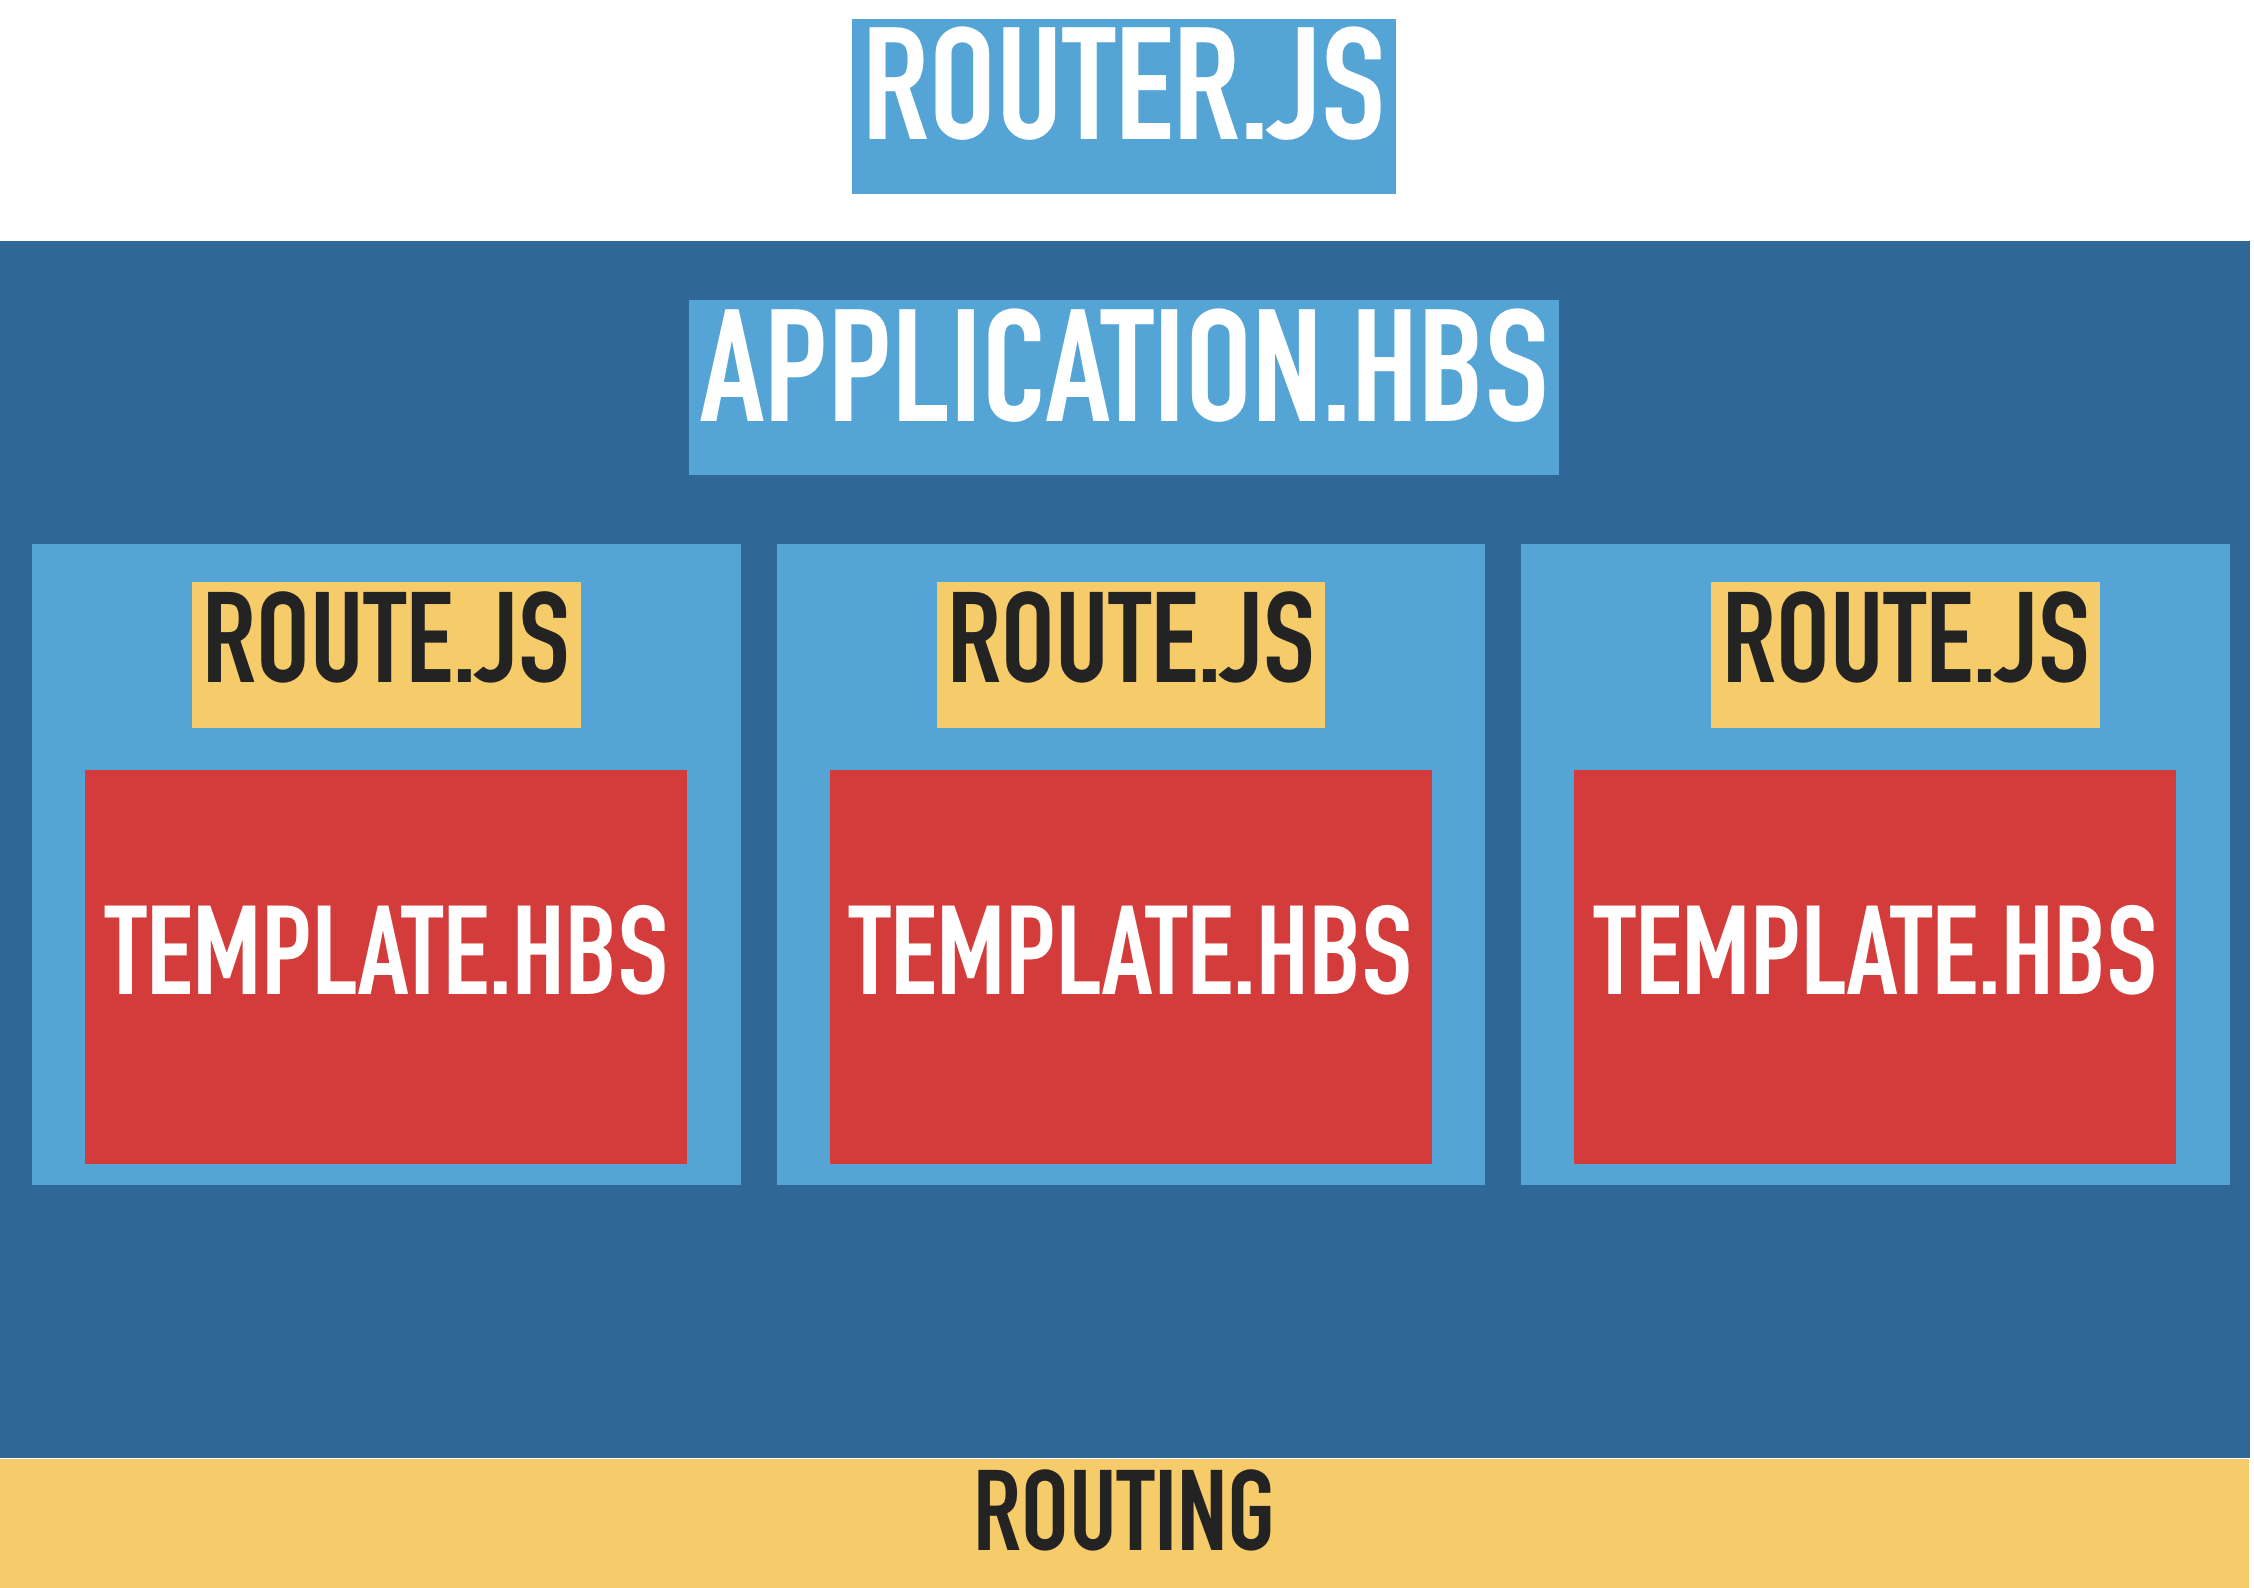 You are going to see the application.hbs in templates folder. This is the first view for the app. Optional you could create the application.js as a route who respond to this template.
We are going to create our first route with cli.
$ ember generate route invites-module

installing route
  create app/routes/invite-module.js
  create app/templates/invite-module.hbs
updating router
  add route invite-module
installing route-test
  create tests/unit/routes/invite-module-test.js
Ember cli help us to create: route.js file, template.hbs, unit test, and suscribe the route in the main router.
The main route looks like this:
import EmberRouter from '@ember/routing/router';
import config from './config/environment';

const Router = EmberRouter.extend({
  location: config.locationType,
  rootURL: config.rootURL
});

Router.map(function() {
  this.route('invite-module');   //<---- your new route
});

export default Router;
It's important understand that the route created has effect over their template, both files have the same name, but are different files (js and hbs).
You could identify this route by the url. For this, running your app, and are going to see this route on localhost:4200/invites-module
So, we will have this: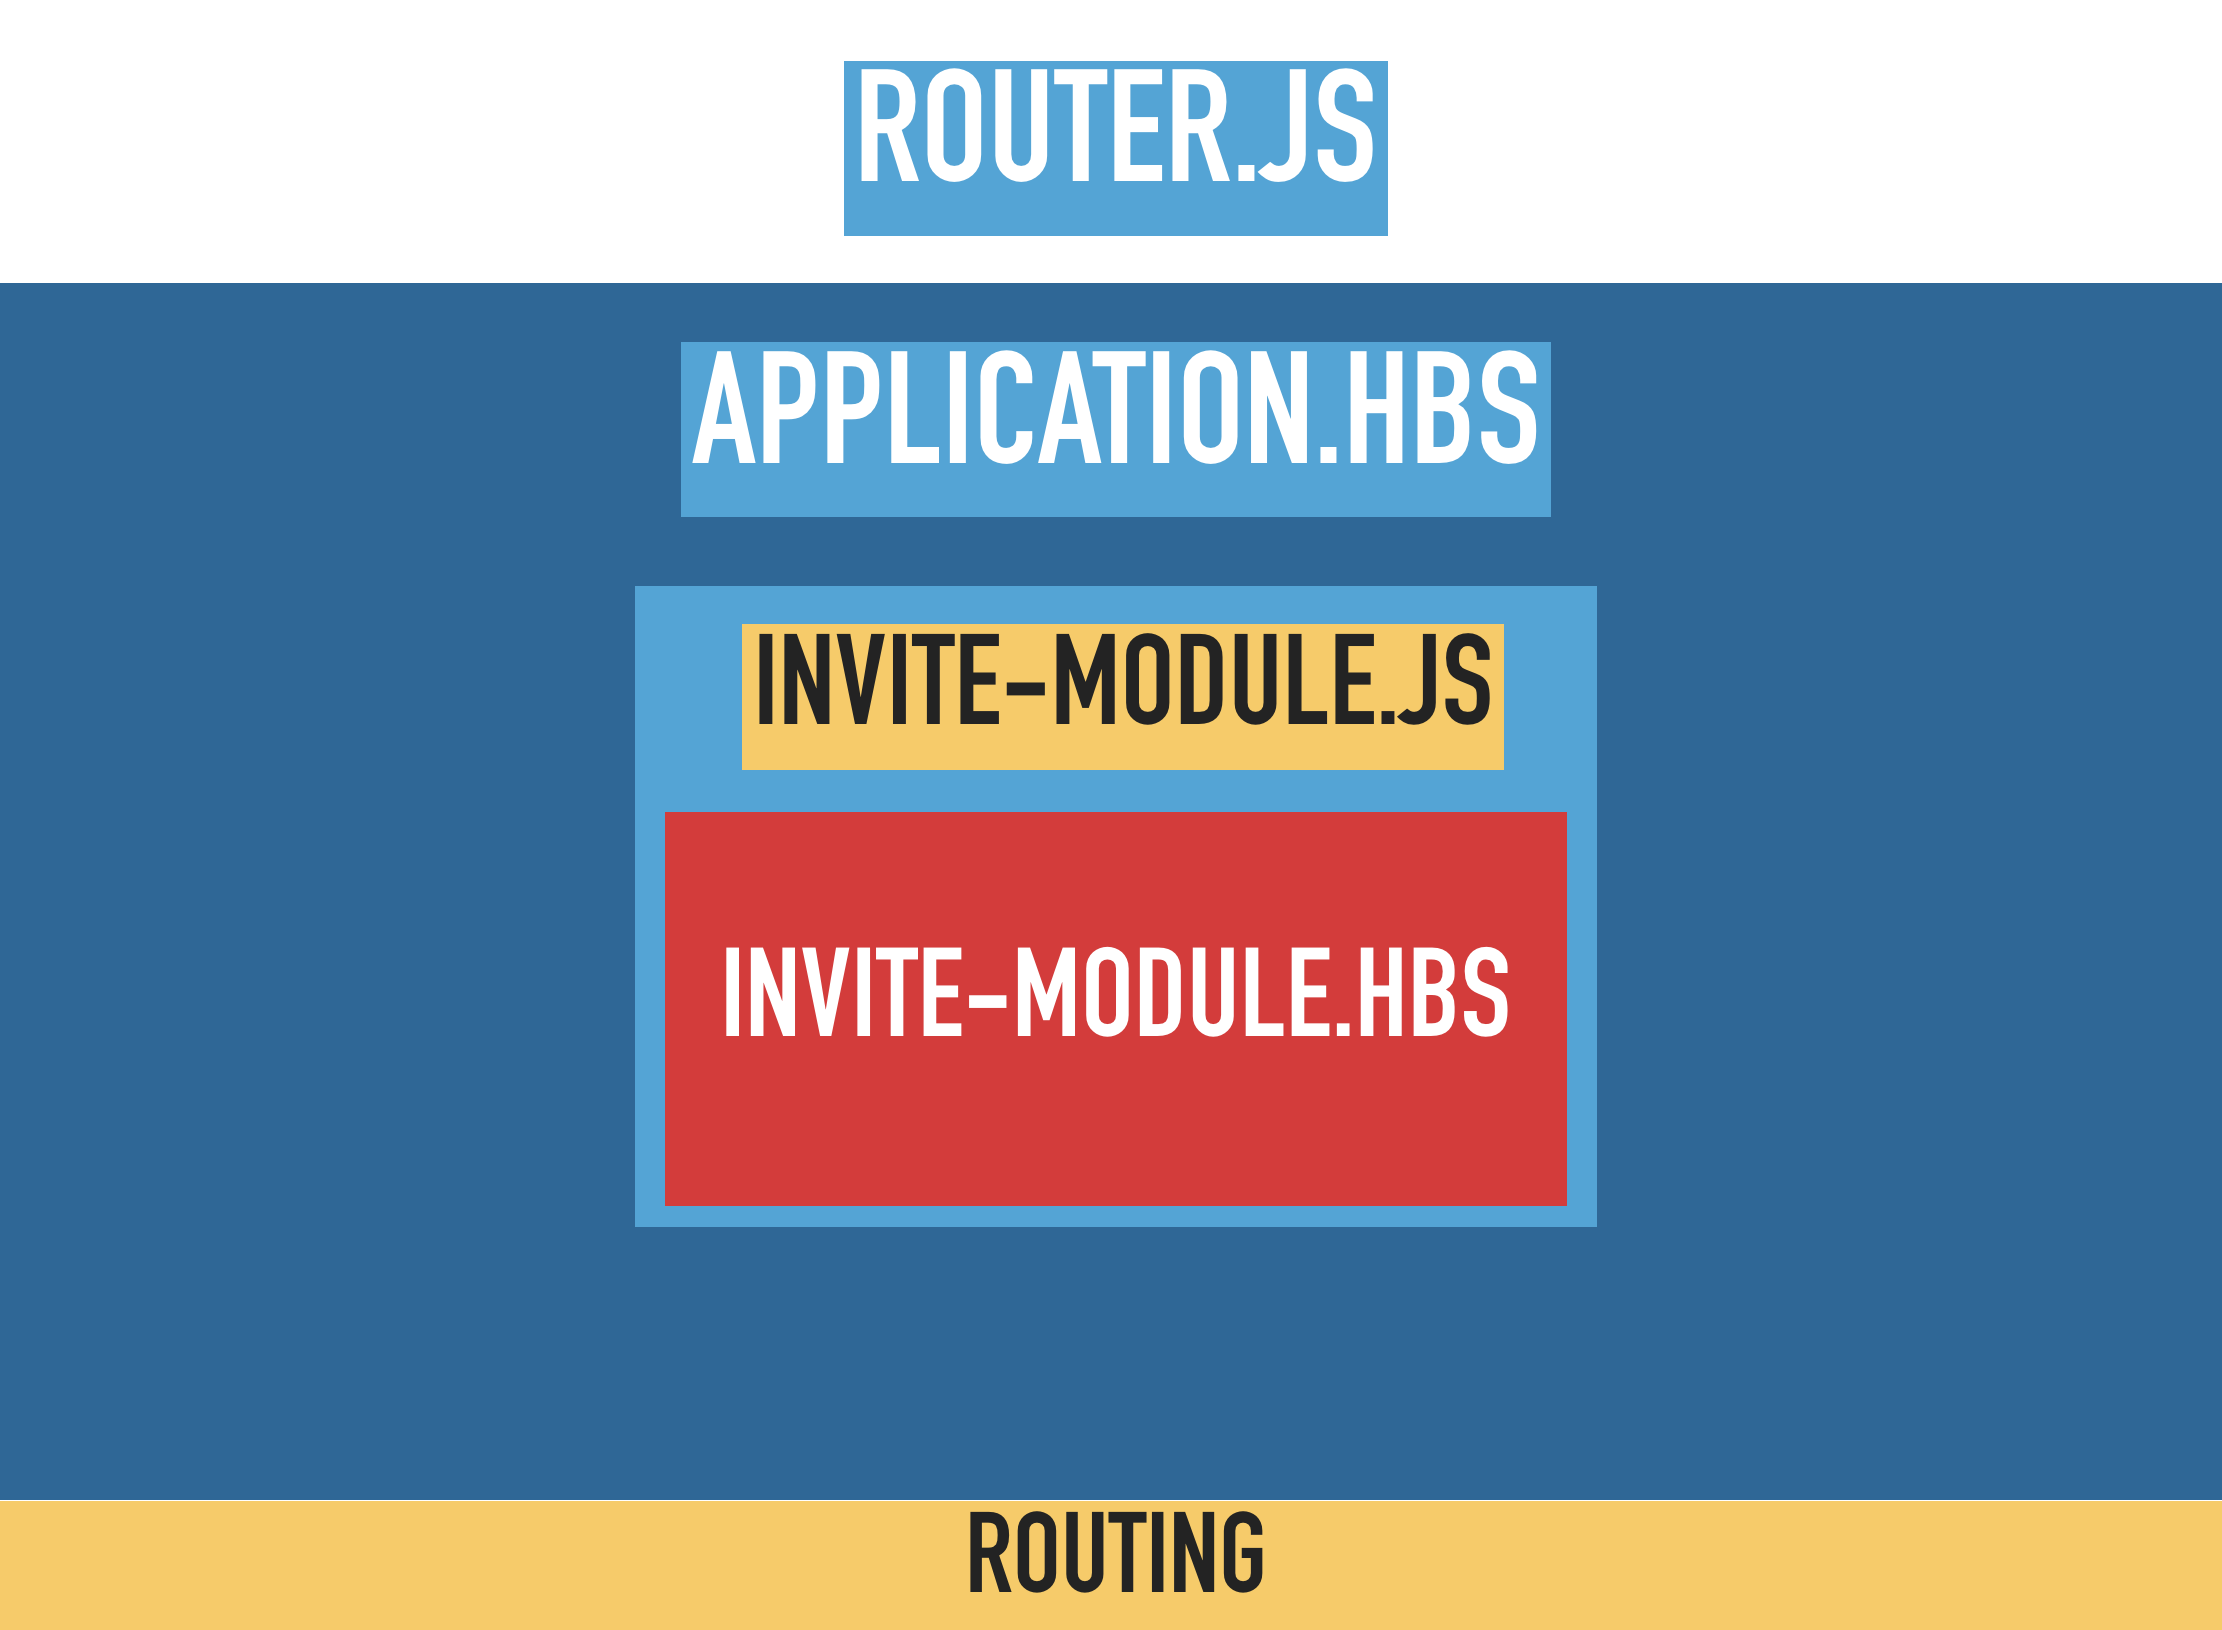
We can create routes (remember: a route containes a route and template) and nested routes. We are going to generate the views and nested views by this way.
In the next chapter we are going to review the templates and how they are render.