Ember Mirage
For test and demo our app, we are going to use Ember Mirage Addon.

With this addon we could simulate and test the endpoints. This addon is for test in develop, and it's very useful for respond to our request.
Installation
ember install ember-cli-mirage
Ember Mirage includes a cli for generate some files. You have to configure Mirage Directory, it contains the follow structure:
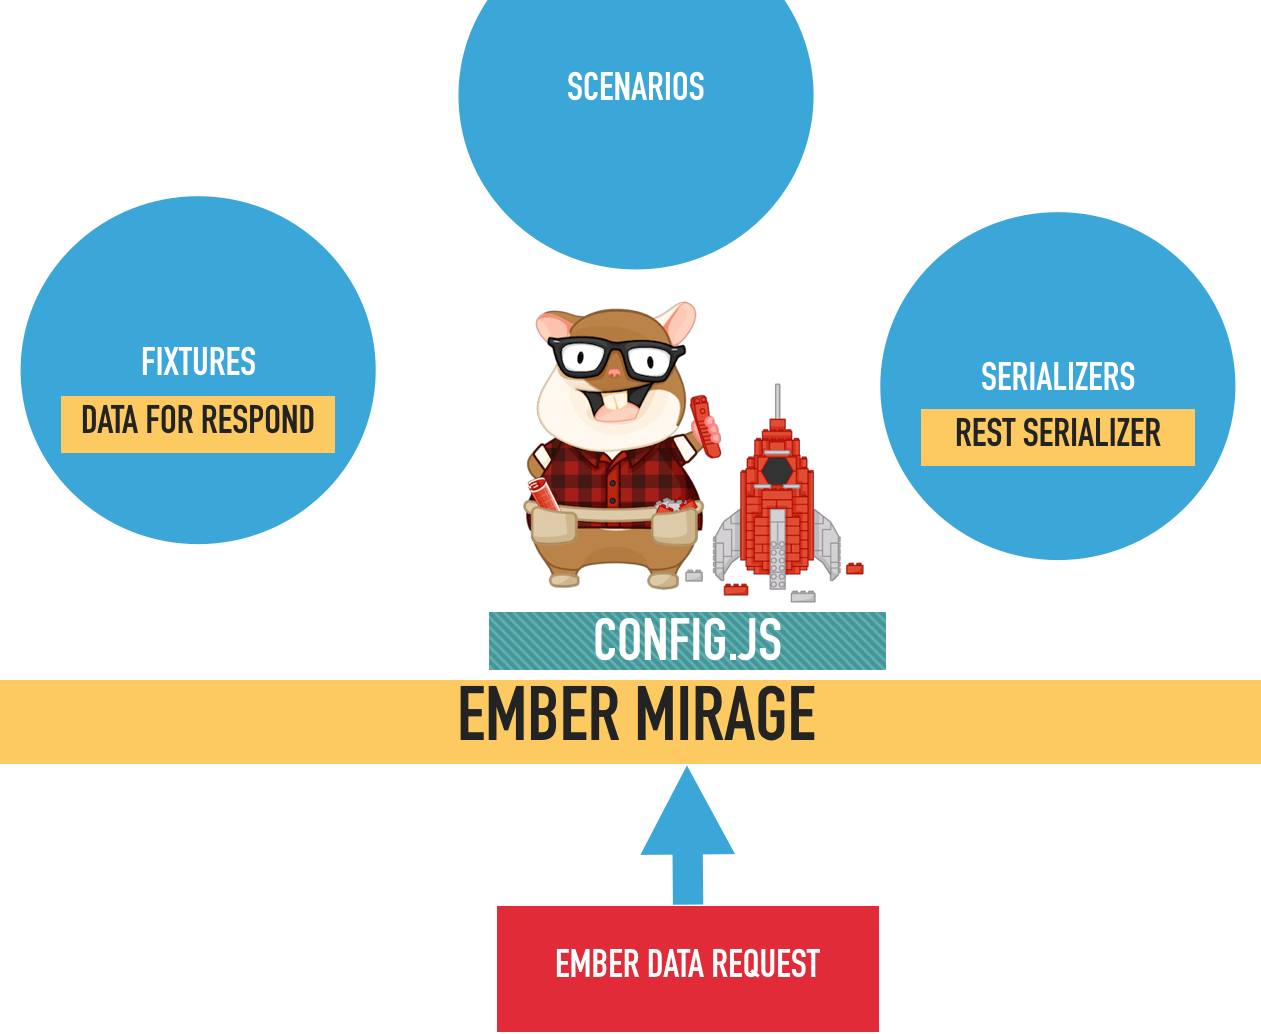
Ember Mirage are going to respond to request from ember data in develop environment.
For configure the mirage, you have to create a fixture with the command cli. The name would be like the model that you have in your app. For example if you have a model person, you will have a fixture named persons
$ ember generate mirage-fixture persons
In this file generated, please add some information:
mirage/fixtures/persons.js
export default [
  {id:1, name:"person 1"},
  {id:2, name:"person 2"},
  {id:3, name:"person 3"}
];
This data will be the response when you find all persons model in your ember application.
For make it possible, we have to load the fixtures.
mirage/scenarios/default.js
export default function( server ) {

  server.loadFixtures('persons'); // Fixture names

}
By default Ember uses JSON API conventions, but we are going to use REST API conventions. For this we have to modify the mirage serializer:
mirage/serializers/application.js
import { RestSerializer } from 'ember-cli-mirage';

export default RestSerializer.extend({

});
As we are use REST conventions, we have to create our REST Adapter in the Ember App.
$ ember generate adapter application
And modify the file created:
import DS from 'ember-data';

export default DS.RESTAdapter.extend({

});
The last step is suscribe the route in mirage config for respond:
mirage/config.js
export default function() {

  this.get('/persons'); // This route is going to respond with the fixtures

}