Creación de un Pipeline
- Instalación de Plugin de Bitbucket
- Crear un Multibranch Pipeline en el Jenkins
- Creación del Jenkinsfile
Instalación de Plugins
Para poder crear un pipeline cuya fuente sea Bit Bucket es necesario instalar el plugin Bit Bucket Branch Source Plugin en la sección de Instalación de Plugins del Jenkins Master.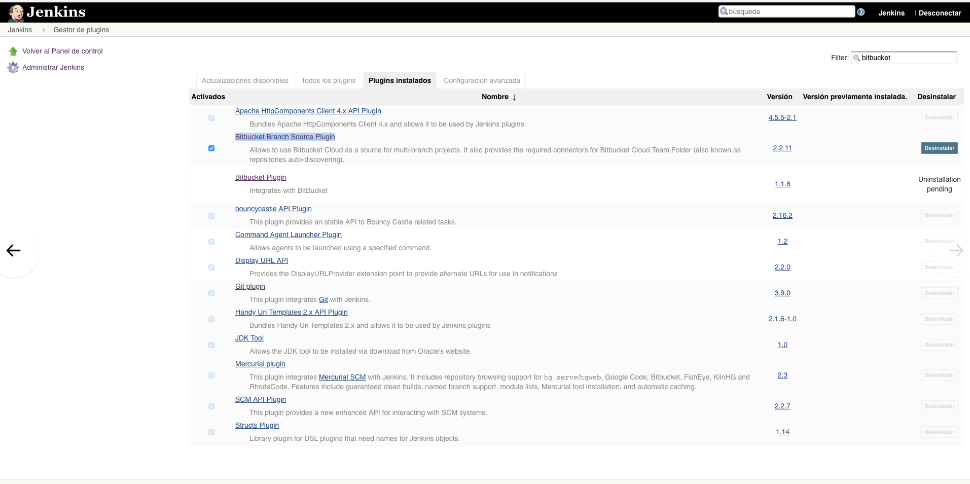
Crear un Multibranch Pipeline en el Jenkins
Para la creación de un pipeline será necesario crear un nuevo proyecto y seleccionar la opción Multibranch Pipeline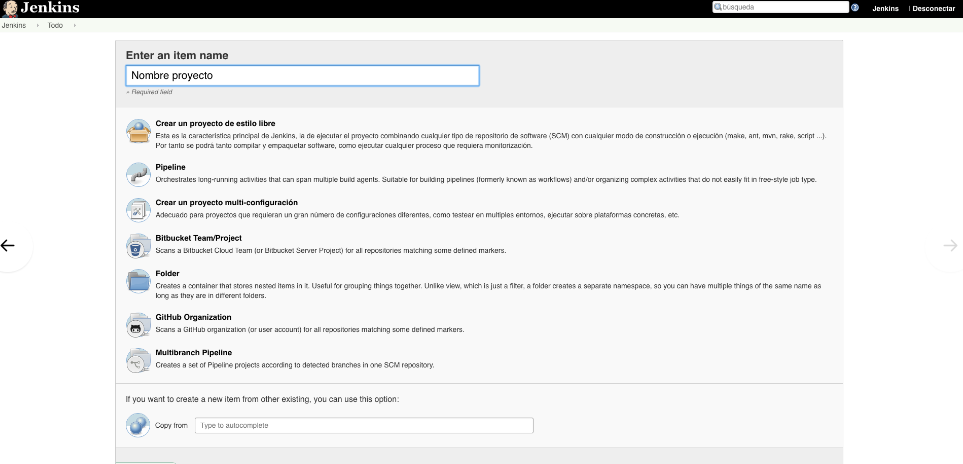
El siguiente paso será asignarle un nombre y agregar la fuente del proyecto dependiendo del repositorio remoto (Github, BitBucket, etc).
Creación del Jenkinsfile
Dentro del repositorio del proyecto es necesario crear y versionar el archivo Jenkinsfile y crear una estructura como el siguiente ejemplo simple:
pipeline {
    agent any

    stages {
        stage('Build') {
            steps {
                echo 'Building..'
            }
        }
        stage('Test') {
            steps {
                echo 'Testing..'
            }
        }
        stage('Deploy') {
            steps {
                echo 'Deploying....'
            }
        }
    }
}
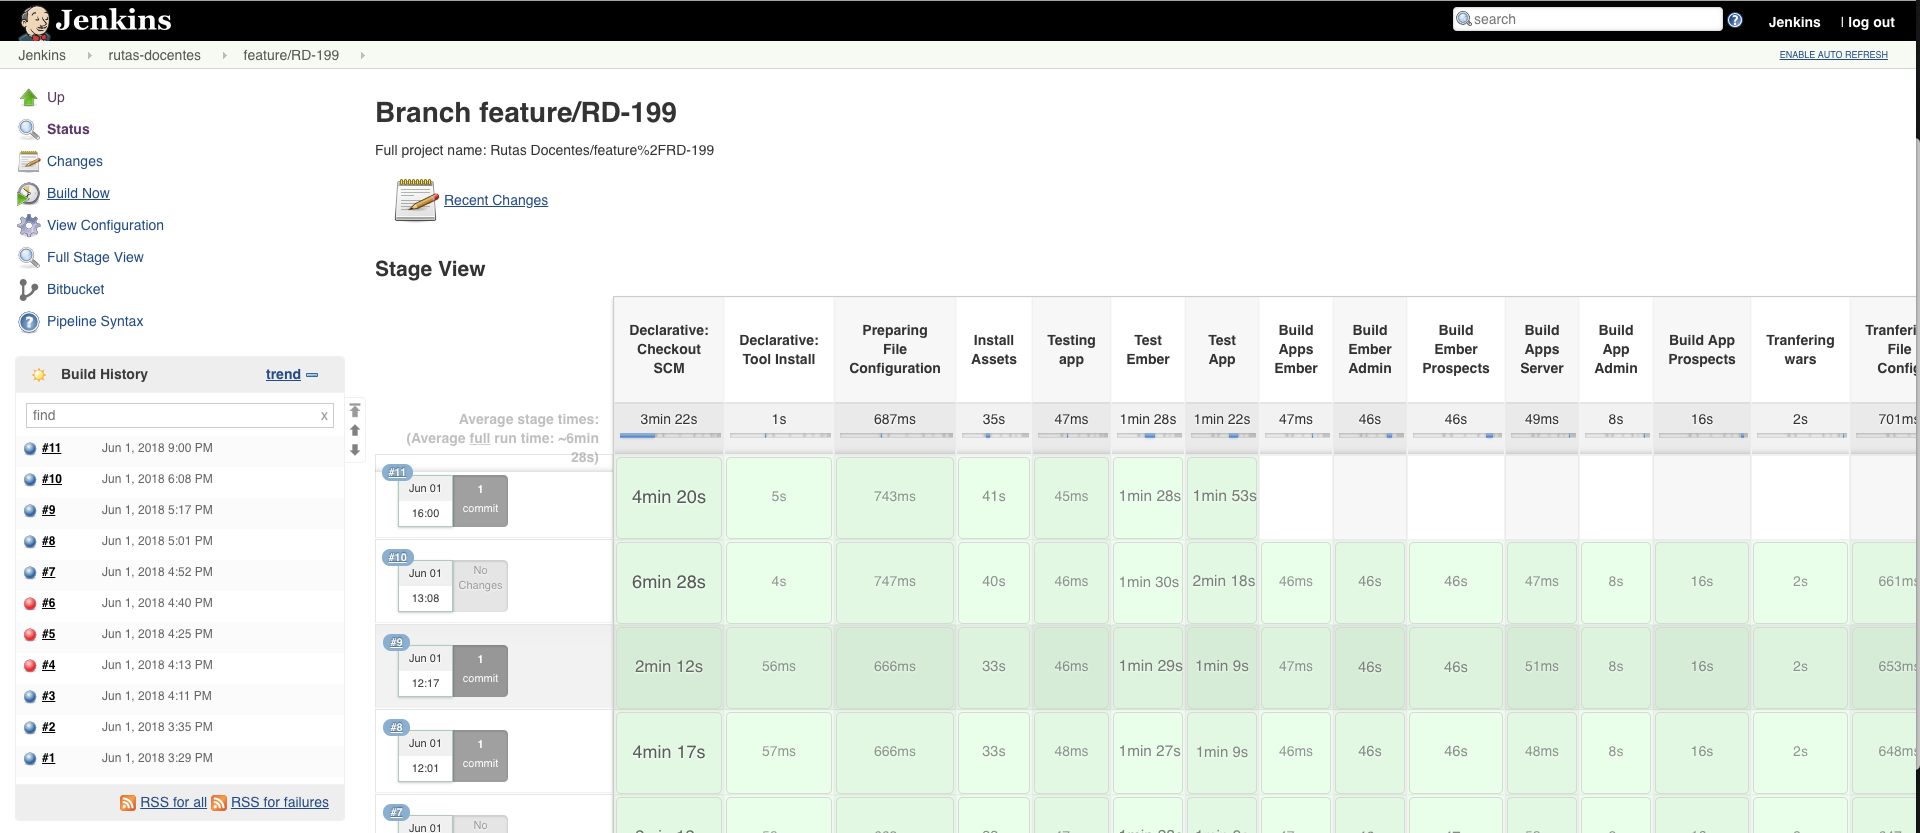
Esta estructura permite crear un pipeline en el Jenkins sin necesidad de generar jobs.
DSL del Jenkinsfile
Es importante identificar los siguientes expresiones del DSL que usa el jenkinsfile para estructurarse:
- pipeline
- agent
- tools
- stages
- stage
- steps
- expression
- parallel
- when
- post
- always
- cleanWs
Este es un ejemplo para construir un pipeline en un proyecto hecho con Groovy y Gradle:
pipeline {
  agent any

  tools {
    gradle "Gradle 3.5"
  }

  stages {

    stage('Preparing File Configuration') {
      steps{
        echo "Create folder project_config and move file conf"
        sh 'mkdir -p $HOME/.project_config/'
        sh 'cp rutas-docentes-DEVL.properties $HOME/.project_config/rutas-docentes.properties'
      }
    }

    stage('Install Assets') {
      steps{
        dir("clientApp"){
          nodejs(nodeJSInstallationName: 'Node 10.3.0') {
            echo 'Instalando componentes de npm'
            sh 'npm install'
            sh 'node_modules/bower/bin/bower install'
          }
        }
      }
    }

    stage("Testing app"){
      parallel{
        stage('Test Ember') {
          steps{
            dir("clientApp"){
              nodejs(nodeJSInstallationName: 'Node 10.3.0') {
                echo 'Running testing'
                sh 'node_modules/ember-cli/bin/ember test'
              }
            }
          }
        }

        stage('Test App') {
          steps{
            dir("appServer"){
              echo 'Testing app'
              sh 'gradle clean test'
            }
          }
        }


                              }
    }


    stage("Build Apps Ember"){
      when {
        expression {
          env.BRANCH_NAME in ["master", "QA"]
        }
      }
      parallel{
        stage('Build Ember Admin') {
          steps{
            dir("clientApp"){
              nodejs(nodeJSInstallationName: 'Node 10.3.0') {
                echo 'Build app admin'
                sh 'node_modules/ember-cli/bin/ember build --environment=adminDevlNew --output-path=../appServer/web/src/main/webapp/WEB-INF/html/ember'
              }
            }
          }
        }

        stage('Build Ember Prospects') {
          steps{
            dir("clientApp"){
              nodejs(nodeJSInstallationName: 'Node 10.3.0') {
                echo 'Build app prospects'
                sh 'node_modules/ember-cli/bin/ember build --environment=4prospectsDevlNew --output-path=../appServer/web_4prospects/src/main/webapp/WEB-INF/html/ember'
              }
            }
          }
        }
      }
    }

    stage("Build Apps Server"){
      when {
        expression {
          env.BRANCH_NAME in ["master", "QA"]
        }
      }
      parallel{
        stage('Build App Admin') {
          steps{
            dir("appServer"){
              echo 'Build app admin'
              sh 'gradle  web:build -x test'
            }
          }
        }

        stage('Build App Prospects') {
          steps{
            dir("appServer"){
              echo 'Build app prospects'
              sh 'gradle  web_4prospects:build -x test'
            }
          }
        }
      }
    }

    stage('Tranfering wars') {
      when {
        expression {
          env.BRANCH_NAME in ["master", "QA"]
        }
      }
      steps{
        dir("appServer"){
          echo "Copy file war to server"
   ç
          sh "scp -o UserKnownHostsFile=/dev/null -o StrictHostKeyChecking=no rutas-docentes-admin.war rutas-docentes.war DAWS03LX@172.31.100.25:~/rutas-docentes/"
        }
      }
    }

    stage('Tranfering File Config') {
      when {
        expression {
          env.BRANCH_NAME in ["master", "QA"]
        }
      }
      steps{
        echo "Copy file config"
        sh "scp -o UserKnownHostsFile=/dev/null -o StrictHostKeyChecking=no rutas-docentes-DEVL.properties DAWS03LX@172.31.100.25:~/rutas-docentes/rutas-docentes.properties"
      }
    }

    stage('Deploy apps in Glassfish Docker'){
      when {
        expression {
          env.BRANCH_NAME in ["master", "QA"]
        }
      }
      steps{
        echo "Deploy apps"
        sh "ssh -o UserKnownHostsFile=/dev/null -o StrictHostKeyChecking=no DAWS03LX@172.31.100.25 'sh deployApp.sh rutas-docentes rutas-docentes.properties rutas-docentes /u01/ebcHub/rutas_docentes:/root/files'"
      }
    }

  }

  post {
    always {
      cleanWs()
    }
  }
}
Al versionar este archivo dentro del proyecto, y una vez creado nuestro Multibranch Pipeline a través de la interfaz web de Jenkins, será posible construir nuestro proyecto.
Automáticamente detectará nuestro Jenkinsfile y comenzará la construcción descrita en él.